```html
The Hidden Cost of Poor Posture: Why Ergonomic Support Matters
Modern lifestyles demand prolonged sitting, whether at desks, in cars, or during leisure activities. Yet, most chairs prioritize aesthetics over anatomical support, leading to chronic pain, reduced productivity, and long-term health risks. Poor posture strains muscles, compresses spinal discs, and restricts circulation. Ergonomic design counteracts these issues by aligning the body’s natural curves with chair contours. Transforming ordinary seating into ergonomic solutions isn’t just about comfort—it’s a proactive investment in physical well-being.

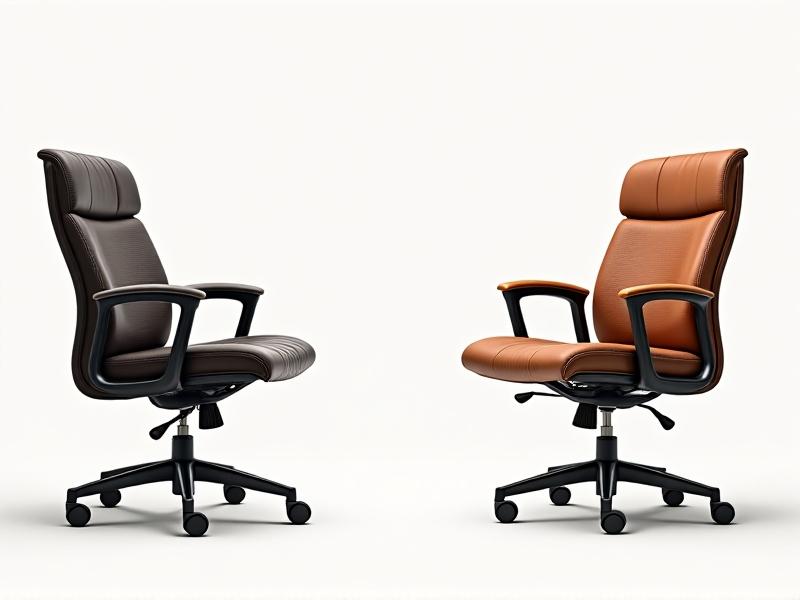
Assessing Your Chair’s Potential: What to Look for in a Base Model
Not every chair is a candidate for transformation, but many have untapped potential. Start by examining structural integrity: wobbling legs or torn upholstery may require repairs first. Prioritize chairs with adjustable height and a sturdy backrest. Flat seats are easier to modify than deeply contoured ones. Check armrests—if removable, they offer flexibility. Materials matter: breathable fabrics or moldable padding respond better to DIY enhancements. A chair with solid bones can become ergonomic gold.
Lumbar Support Upgrades: From Basic Cushions to Custom Solutions
The lumbar spine’s inward curve often loses support in standard chairs, causing slouching. Simple fixes include rolled towels or inflatable cushions, but advanced modifications involve memory foam inserts or 3D-printed attachments. For a tailored approach, measure the distance between your lower back and the chair’s backrest—this gap determines cushion thickness. Some creators retrofit recliner mechanisms for adjustable lumbar depth. The goal? Dynamic support that adapts to movement, not static rigidity.
Seat Cushion Overhauls: Balancing Comfort and Spinal Alignment
Traditional seat cushions sag over time, tilting the pelvis and straining the lower back. Replacement options range from gel-infused pads for pressure relief to wedge-shaped cushions that tilt hips forward. For a permanent fix, disassemble the seat and replace foam layers—high-density foam at the base, topped with a conforming latex layer. Waterfall edges prevent thigh compression, while breathable covers reduce heat buildup. Test thickness: too high, and your knees won’t bend at 90 degrees; too low, and circulation suffers.

Armrest Adjustments: Enhancing Upper Body Support
Fixed armrests force shoulders into awkward elevations. Replace them with adjustable models or DIY platforms using PVC pipes and padded tops. Ideal armrests align elbows at 90 degrees, allowing shoulders to relax. For keyboard users, consider attaching swing-away trays or memory-foam wraps. If removing armrests entirely improves mobility, ensure the chair’s stability isn’t compromised. The aim is to create a neutral upper body posture without restricting natural movement.
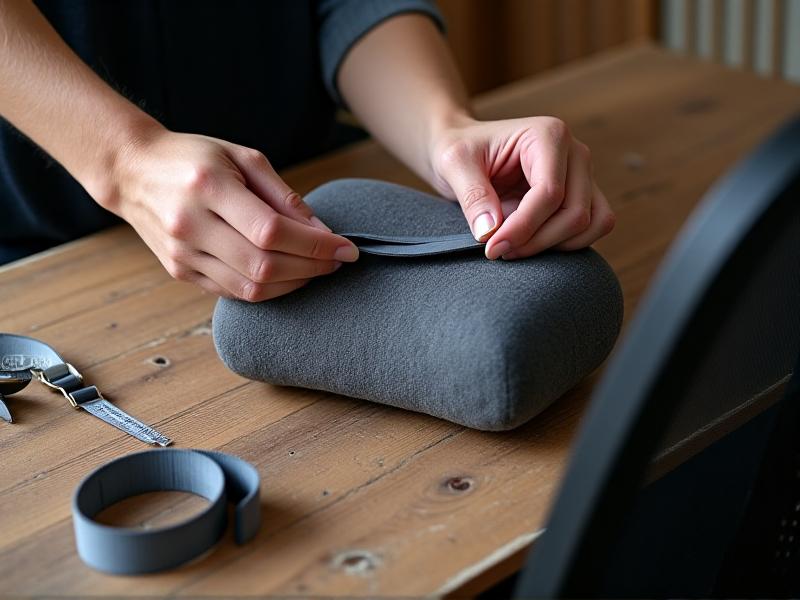
DIY Tools and Materials: Building Your Ergonomic Toolkit
Transforming chairs requires basic tools: screwdrivers, pliers, and heavy-duty scissors. Materials like medical-grade foam, orthopedic gel pads, and adjustable straps are invaluable. For structural changes, explore aluminum brackets or 3D-printed connectors. Adhesives matter—use industrial-strength hook-and-loop tape for removable parts. Always measure twice: a cushion 2cm too wide can negate ergonomic benefits. Safety first: wear gloves when handling foam and test weight limits after modifications.
Cost Analysis: DIY Transformation vs. Buying New
High-end ergonomic chairs cost $800–$1,500, while DIY projects average $50–$300, depending on materials. A lumbar cushion might cost $20 to make versus $120 retail. However, factor in time—a weekend project vs. instant delivery. For businesses, bulk modifications could slash expenses. Yet, some premium features (e.g., synchronized tilt mechanisms) are hard to replicate. Weigh durability: a reupholstered seat with quality foam may outlast cheap pre-made chairs.
Maintaining Your Transformed Chair: Longevity Tips
Ergonomic modifications demand maintenance. Inspect straps and adhesives monthly for wear. Rotate cushions to distribute pressure evenly. Clean breathable fabrics with mild detergents to prevent compression loss. Tighten bolts after initial adjustments settle. For leather components, condition annually to avoid cracks. Track changes in comfort—discomfort may signal needed tweaks. A well-maintained DIY chair can serve reliably for 5–7 years, rivaling commercial options.
The Science Behind Ergonomic Design: How Small Changes Make Big Differences
Ergonomics isn’t guesswork—it’s rooted in biomechanics. Studies show that tilting the seat forward 5–10 degrees reduces lumbar disc pressure by 35%. Similarly, armrests set at elbow height decrease trapezius muscle activity by 50%. Even minor adjustments, like a 1-inch increase in lumbar support thickness, can improve blood flow to the legs. These principles guide effective transformations, turning arbitrary tweaks into evidence-based solutions.
Real-Life Success Stories: Before and After Transformations
Take Maria, a freelance writer who converted a dining chair into an ergonomic workstation using a seat wedge and lumbar pad. Her neck pain vanished within weeks. Then there’s James, who retrofitted his grandfather’s rocking chair with gel armrests for arthritis relief. These stories highlight that ergonomic transformation isn’t one-size-fits-all—it’s about adapting tools to individual needs, budgets, and body types. Your chair could be the next success story.